Most folks in the audio and music recording community are familiar with TOMB, the Tape Op Messageboard. It’s an online hangout for fans of the incredible free magazine and audio nerds in general. Last year I posted some photos and a short writeup on the amp isolation box that Jake Nussbaum and I built for the Badlands studio. I got an email recently asking how we did it, so I thought I’d share it again here. Be sure to click on the link at the end for full discussion on the messageboard.
Before I get to the original post, if you’re not familiar with what purpose an amp isolation box serves, here’s a quick primer. When recording a live band (with drums, electric guitars, and bass, for example) it’s often beneficial to record each instrument on its own channel, so that you can make adjustments to that instrument later without affecting the others. Sometimes this isolation is achieved by recording each instrument separately; drums first, bass second, guitar third, etc. This provides complete isolation between instruments, but can result in an unnatural performance that lacks the energy of a live band. An iso box is basically a big heavy container that can fit an entire guitar amp and microphone inside. This allows the guitarist to play at the same time and in the same room as the drummer without sound from his/her amp bleeding into the drum microphones. It’s a helpful tool that can lead to exciting recordings without sacrificing flexibility when it comes time to mix.
So that wasn’t very quick, but whatever. Here’s the original post:
I wanted to share some pics of an isolation box for amps I recently built for my studio. It wasn’t that much work, and was relatively cheap to build (~$100 total). The best part is that it works REALLY well. We had a Fender Deville cranked, and got nearly no bleed at all into our drum mics, roughly 15 feet away. I have to thank Red Rockets Glare for the design, which was simple yet effective.
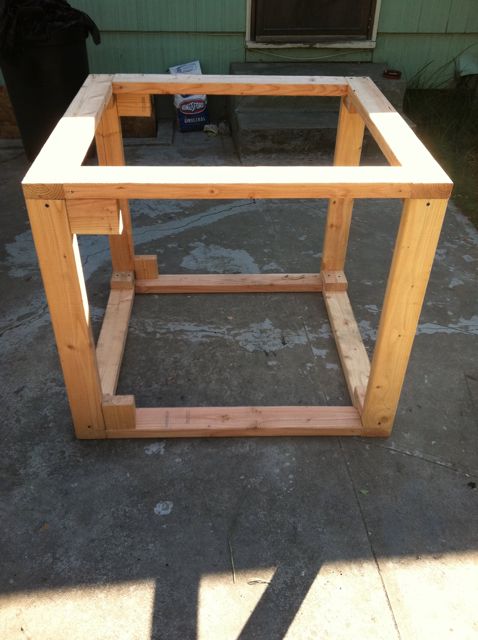
Here’s the frame. We used 2×4 framing lumber since we knew it’d end up being pretty heavy.
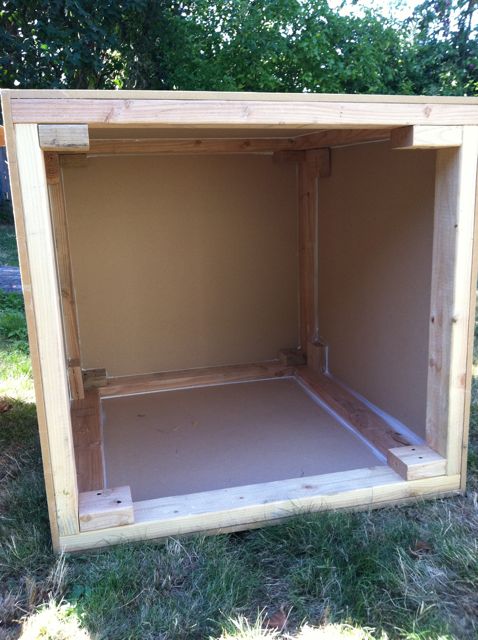
Next we attached the outer layer, which is 1/2″ MDF board. This stuff is dense! We caulked the seams, though I’m not sure how much of an acoustic difference it made.
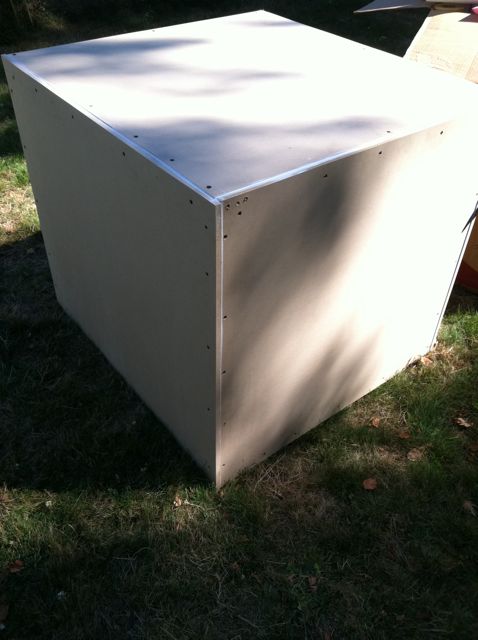
Here’s a picture of the outside of the box with the outer layer attached. Because we didn’t have a table saw and had to have the Home Depot cut the MDF, our cuts were not perfect. Hence the bit of overhang. Again, we caulked the seams just in case.
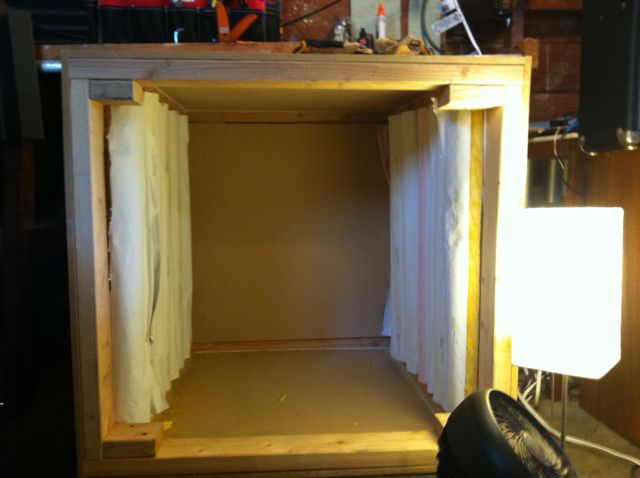
Here’s a picture of the insulation we used. Pipe insulation. Not ideal right? Of course not, but I got a box of 40 4′ rolls of these for $5 at a local construction materials re-use store. If we had to buy new insulation the cost for this thing may have been double what it was. We ended up unrolling these and putting about 34 rolls inside the box.
At this point we moved the box into the garage, since it was already super heavy. You can see the two layers of insulation on the sides before we added the second layer of MDF.
Here’s the box with all insulation and MDF attached. Not pictured is the plug/door, which is Roxul cut to the exact dimensions of the front attached to an MDF board and then clasped to the box. Also not pictured is the packing blanket inside to kill internal reflections.
While it looks pretty DIY, it sounds great! It’s an incredibly effective way to increase the flexibility of a small one-room studio, and I’d definitely recommend it as a fun project! Ours is designed to fit many popular combo amps including Twins, AC30s, and Devilles, but of course you can go bigger or smaller depending on your needs.


Read the resulting discussion here.
If you’ve built anything similar or want to share other DIY acoustic/audio projects, post a link in the comments!

